Pages

Showing posts with label Dessert. Show all posts

Monday, January 31, 2011

I Love Snow Days


Over the past week I've spent a lot of time in kitchen since Mini Coopers and over a foot of snow just don't mix. I didn't do any blogging, but I did do some baking and LOTS of picture taking.

First I made Smitten Kitchen's Marshamallows which are kind of messy, but they are also TO DIE FOR. After eating these, I may never eat another store-bought mallow again.


Then there were these lovely little heart cookies from The Cookie & Biscuit Bible (also pictured above).


And last, but certainly not least, Dorie Greenspan's Linzer Sables--there aren't words to do these cookies justice, but thankfully there are pictures.

Wednesday, January 12, 2011

Cuban Black Beans & Quinoa and Vegan Red Velvet Cupcakes

Traditionally this dish is made with rice, but when I'm looking for that extra boost of protein I often substitute quinoa for rice. This recipe came from my friend Maren's in-laws, and I've probably made it at least once a month since her wedding 2 years ago.

Cuban Black Beans and Quinoa (or Rice)
1 - Medium Onion
1 - Green Bell Pepper
3 Cloves - Garlic
1 Can - Black Beans
1 Cup - Quinoa
2/3 Can - Water (you can add more or less water, depending on how juicy you like things)

- Finely chop onion, pepper, and garlic (I use my Tupperware Quick Chef which is the most amazing thing ever: I just throw veggies in and crank away!).
- Sauté vegetables in a medium skillet using several glugs of olive oil 'til onions are translucent.
- Add beans (juice included), quinoa, and water: stir to combine.
- Cover and simmer for approximately 30 minutes or until quinoa is fully cooked.

Since Tuesday was my Vegan Day for this week, I served the black beans & quinoa with some roasted cauliflower and  then I made these a-mazing cupcakes that I found via Tales from a Racey Kitchen for dessert. Below is the recipe for the cupcakes, adapted slightly from the original--this makes 1 dozen delicious cupcakes.

Red Velvet Vegan Cupcakes
Adapted from Vegan Cupcakes Take Over the World via Tales from a Racey Kitchen
1 1/4 Cup - Flour
1 Cup - Sugar
2 Tablespoons - Cocoa Powder
1/2 Teaspoon - Baking Powder
1/2 Teaspoon - Baking Soda
1/2 Teaspoon - Salt

1 Cup - Silk Vanilla Soy Milk
1/3 Cup - Canola Oil
2 Tablespoons - Red Food Coloring
2 1/2 Teaspoons - Vanilla Extract
1/2 Teaspoon - Almond Extract

- Sift together dry ingredients in medium mixing bowl.
- In another medium bowl, whisk together wet ingredients.
- Gently fold wet ingredients into dry, but be sure not to over stir!
- Grease a muffin tin (or use cupcake liners) and fill each one 2/3 full of batter.
- Bake at 350°F for 20 minutes or until a toothpick comes out clean.
- Allow them to cool completely before icing, but I won't judge you if you sample a plain one :)

For the icing I vegan-ized my grandmother's famous red velvet cake icing, and it actually turned out really well!

Nana's Red Velvet Cake Icing, Vegan-ized*
5 Tablespoons - Flour
1 Cup - Silk Vanilla Soy Milk
1 Cup - Sugar
1 Cup - Vegetable Shortening
1 Teaspoon - Vanilla Extract
1 Tablespoon - Lemon Juice (optional)

- In a double boiler cook the flour and milk (adding milk gradually), stirring constantly 'til mixture thickens.
- Set flour & milk mixture and side and let it cool.
- Beat Sugar, shortening, and vanilla in a medium mixing bowl until sugar fully dissolves.
- Beat in flour/milk mixture.
- Add in lemon juice if desired, and beat until you've reached your desired consistency.


*For the regular version just use regular milk instead of soy and butter in lieu of shortening.

Thursday, December 16, 2010

Great Grandma's Meringues

For a cookie that involves very few ingredients and seems relatively simple, meringues are temperamental little devils. When I mentioned to my mother that I wanted to attempt good old Jessie Bernice's meringues, I was cautioned to be sure and check the weather first. What? Huh? Seriously? Apparently making meringues on a humid day will cause them to become chewy and/or flat--regardless, it ruins them. So, I heeded her warning and awaited a crisp, dry day to commence meringue madness.

After successfully making 2 batches, I must say I'm kind of obsessed with them at the moment. They're awesome because you can make them almost any flavor and you can dye them fun colors! Since all of my Christmas decor is pink and green, obviously I made pink and green meringues. The pink ones are almond flavored and the green ones are mint--perfect for an after dinner treat!

Great-Grandma's Meringues
4 - Egg Whites
1 Cup - Sugar
1/2 Teaspoon - Cream of Tartar
1/2 Teaspoon Flavoring
Several Drops of Food Coloring (technically this is optional, but in my kitchen, fun colors are a must!)

- Preheat oven to 175°F
- Beat eggs 'til frothy
- Add Cream of Tartar
- Beat 'til soft peaks form
- Slooooooooowly add sugar while continuing to beat the egg whites (p.s. I heart my Kitchen Aid stand mixer a lot at times like this)
- Add in flavoring and color and beat 'til incorporated
- Using a pastry bag or a spoon, dollop mixture onto parchment-covered cookie sheets
- Bake for 1 Hour
- Turn oven off and allow meringues to cool IN THE OVEN for 1 Hour

Under no circumstances open the oven door during the 2 hours that the meringues are baking/cooling.

Wednesday, December 15, 2010

From the Nancy Drew Cookbook--Mrs. Nickerson's Holiday Cookies, Flop or Fab?

I love Nancy Drew--maybe not as much as the Hardy Boys, but I'm still a big fan. Over the past few years I've been ebaying the 50's-60's versions of the books. I've read the earlier ones, and it's actually quite interesting to compare how the books were changed between the first and second printings. In my quest to collect the whole series, I stumbled across the Nancy Drew Cookbook. Published in 1977, the book has some very "interesting" vintage recipes, and the ones I've tried have been quite good (love the 99 Steps French Toast) . Regardless, the recipe names and the "Drew's Clues" alone, make it a cookbook worth buying.

As part of my Christmas baking extravaganza, I decided to try "Mrs. Nickerson's Holiday Cookies." Before I say anything bad, the cookies are really tasty and similar to a madeleine. The recipe as written, however, has a lot to be desired. Let's just say if that's a sampling of Mrs. Nickerson's cooking, it's no wonder that Ned was always at the Drew's house snarfing down Hanah Gruen's culinary delights.

Below is the recipe as written, with my notes in red. It took me 4 rounds to get it right, but I'll share my tips and save you the time, trouble, and really hideous cookies.

1 Stick Butter
2 Eggs
1 Cup Sugar
1 Tablespoon Milk
1/2 Teaspoon Vanilla Flavoring
1/2 Teaspoon Salt
1 Teaspoon Baking Powder
1 1/2 Cups Flour
2 Squares Bitter Chocolate, Melted or
2 Tablespoons Cocoa (I opted for the cocoa)

You need 3 Mixing bowls! One medium, two small. Mix butter, sugar, salt, baking powder, and flour together in one of the bowls. In another bowl, beat the eggs and stir in the milk and vanilla. Add slowly to the dry mixture and stir. I thought the mixing combos were a little odd, but I followed them anyway. You'll also notice that this doesn't look like much batter, but it stretched way further than I expected and made 63 cookies.

Place 1/4 of the batter in the third bowl. Add the melted chocolate or cocoa. Heat the oven to 350°F.

Grease a cookie sheet, if you want to burn the edges and have the cookies stick to the sheet. Instead, I recommend placing a piece of parchment paper on the cookie sheet. Drop both kinds of batter on it, a teaspoon at a time, side by side so they're touching.

Flatten together with a wet fork, if you want soggy cookies. These cookies will flatten enough on their own medling the two doughs together. Add white, red, or green sugar as decoration if you want really ugly cookies. Bake for 12 minutes if you like your cookies to double as weapons. I suggest baking for 9-10 minutes depending on your oven.

Monday, November 29, 2010

Dark Chocolate Pots de Die For

These delightfully indulgent desserts are a bit thicker than traditional pots de cremes, yet still maintain that smooth and rich texture that can only come from nice, fattening ingredients. This is a great dinner party dessert since it doesn't require a ton of ingredients or a lot time; it can also be prepared up to a day in advance. The stirring may get a bit tedious, but I find creating patterns as I stir passes the time. As a child when I would help my grandmother cook, I always got stuck with stirring and so (my horsey readers can appreciate this) to make the task less tedious I would trace jump courses or Dressage test patterns in whatever I happened to be stirring.

I portioned this batch into 5 servings, but since I couldn't even finish a whole one, I'd recommend spreading the mixture out over 6 dessert glasses.

Dark Chocolate Pots de Die For
4 - Egg Yolks
1/3 Cup - Sugar
1 Pinch - Salt
1 1/2 Cups - Heavy Cream
1 Cup - Dark Chocolate Chips or Pieces

- In medium bowl whisk together yolks, sugar, and salt until well-blended.

- Place heavy cream in medium sauce pan and warm over medium heat until it just starts to think about   boiling, but don't let it actually boil!

- Next slowly whisk warmed cream into yolk and sugar mixture a little bit at a time. It is crucial not to add too much too fast or else the heat from the milk will cause the yolks to scramble.

- Once you've incorporated everything into the medium bowl, transfer that mixture back to the sauce pan.

- Now it's time to camp out at the stove :)

- Heat the mixture over medium heat, stirring CONSTANTLY until the mixture finally thickens. There will be times when it seems like it won't happen, but it will, and you'll know it when it does!

-Once custard thickens remove from heat and whisk in chocolate.

- Pour mixture into 6 dessert glasses, chill, and thoroughly lick remaining mixture from bowl.

Thursday, November 25, 2010

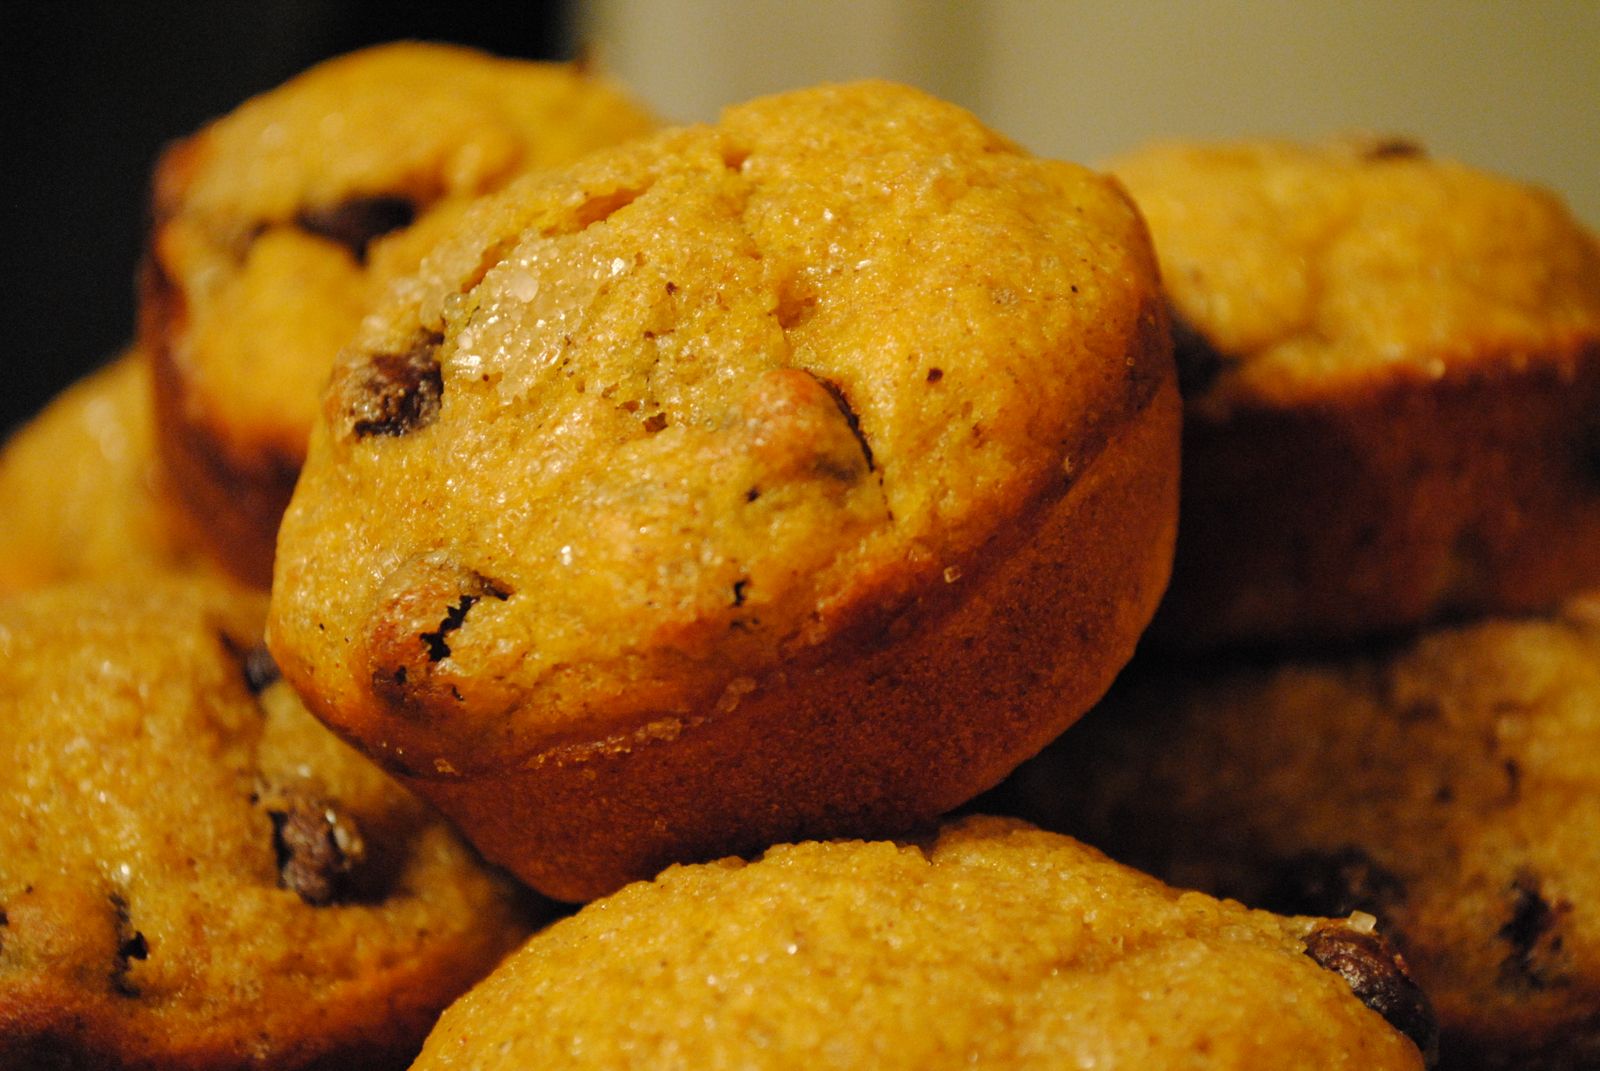
Thanksgiving Breakfast: Pumpkin Muffins


While I'm thankful for many things this year, I'm extra thankful that I'm doing absolutely zero cooking and/or baking for this year's Thanksgiving dinner (last year I hosted over 20 crazy family members). If you're hosting today, you probably aren't up for any more baking than is absolutely necessary. However, if you're like me and have abandoned the cooking ship, these muffins are a tasty, easy treat for breafast or just a pre-dinner snack. This recipe is also excellent for using up any leftover pumpkin.

I wanted mini and regular-sized muffins so I divvied up the batter, which made 24 mini and 8 regular muffins.

Pumpkin Muffins with Chocolate Chips
1- Egg
1 - Cup Pureed Pumpkin
1/2 Cup - Milk
1/2 Cup - Canola Oil
1 Tsp - Vanilla Extract

2 Cups - Flour (I would normally use all whole wheat, but I was running low, so I used half white and half whole wheat in the pictures shown)

1/3 Cup - Sugar
1 Tablespoon - Baking Powder
1 Tsp - Salt
1 Tsp - Cinnamon
1/4 Tsp - Nutmeg
1/4 Tsp - Ginger

1 Cup - Chocolate Chips
- Preheat oven to 400°F
- Generously grease muffin tins
- Lightly beat eggs
- Add pumpkin, oil, and milk: mix 'til combined
- In separate mix flour, sugar, baking powder, and spices.
- Add dry ingredients in 3 parts to pumpkin mixture, and stir until the flour is just incorporated
- Mix in chocolate chips
- Spoon batter into tins
- Sprinkle batter with raw sugar (optional, but recommended)
- Bake for 13 to 15 minutes or until a toothpick comes out clean.


Happy Thanksgiving!

Thursday, November 18, 2010

Perfect Pumpkin Crème Brûlée--Take That, Wegmans!

Once upon a time, I got a pumpkin crème brûlée from Wegmans, and it was amazing! Then I attempted to replicate it, and that was not so amazing. I've tried several recipes over the past couple years, but nothing has come even close to the one I bought at Wegmans. While my failed attempts were tasty, they just weren't quite the right texture or flavor as what I wanted them to be. I must admit that I've found very few recipes that I can't conquer, so I decided it was time to battle the brûlée yet again.

I'm slightly obsessed with Saveur Magazine and Saveur.com, so I decided to see what they had in their files. I found a base crème brûlée recipe that was adapted from a Dieter Schorner (former pastry chef at Le Cirque, NYC) concoction. I did a little more adapting since I wanted a pumpkin crème brûlée, and this time, my friends, it was perfect.

I think finding the right recipe was key, but I think using real ingredients is also essential. This time I used real pumpkin (leftover from a Blue Hubbard I roasted and froze last fall) and I used Trickling Springs heavy cream, which is most certainly the real deal.

Here is my adaptation of Saveur's adaptation: bonne chance!

2 Cups - Heavy Cream
5 Tbsp - Sugar 
1 Tsp - Cinnamon
1/2 Tsp - Nutmeg
1 Tsp - Vanilla Extract
1 Pinch - Salt

4 - Egg Yolks
1 Cup - Pumpkin Pureé

1. Preheat oven to 275°. In a small pan, bring cream, 2 tbsp. sugar, vanilla, cinnamon, nutmeg, and salt just to a boil over medium heat. Remove from heat and set aside to cool.
2. In another bowl, whisk egg yolks with 1 tbsp. sugar until sugar dissolves, and then whisk in Pumpkin Puree.

3. Slowly whisk in cooled cream (if it is not cool, yolks will scramble).

4. Strain through a fine sieve (you CANNOT skip this step)

5. Pour custard into 9inch dish or divide custard between 4 shallow gratin dishes (each about 1/2 cup in capacity).

6. Place dishes in a baking pan (or I used a large Pampered Chef skillet), then place pan in oven. Pour enough cold water into pan to come about halfway up sides of dishes. Bake until custard is set, 40-45 minutes for 1 large dish or 30-35 minutes for the smaller dishes.

7. Cover cooled custard with plastic wrap--make sure the custard is cool before you cover it, or else condensation will form and you'll have a layer of water on top of your custard.
8.Chill in refrigerator for at least 4 hours or overnight.

9. Right before you're going to serve, sprinkle sugar on top of custard and use a blowtorch to caramelize the sugar topping.

Wednesday, July 8, 2009

Richele Makes Apple Sauce

When I was a youngster I remember my mom making apple sauce only twice: once with a foley mill and then once with this magical thing called a Squeezo (the Squeezo truly is magical because you don't have to peel or core the apples). What I recall most, though, was how wonderful the fresh, tart apple sauce tasted. If you've never had homemade apple sauce, you're missing out. The stuff you buy at the stores doesn't even come close to real apple sauce.

I was at Orr's Farm Market a few weeks ago and was super excited to see that they had Lodi apples. I guess you can use pretty much any variety of apple, but I think Lodi are the best for apple sauce since they're nice and tart. Anywho, I bought a bushel, but there was just one problem....where was the squeezo?! Fret not, we found it buried deep in storage just waiting to churn out some sauce.

There's a children's book or something that says "rain makes apple sauce." I don't know about rain, but here's how Richele makes apple sauce:

1. Wash the apples and cut into quarters
2. Fill a large pot about 2/3 full and place a running over 1/2 cup of water in the pot
3. Cook on Medium-High until things start to soften up, then turn back to Medium-Low until all apples are smushy 4. Load up the Squeezo 5. Crank Away! 6. Add sugar to taste


7. Enjoy or Freeze*+!!!!

*Freezing Tip: place a piece of wax paper on top of sauce before putting the lid on; this prevents crystals from forming on sauce
+P.S. I am kind of obsessed with the new Ball freezing containers

Thursday, June 4, 2009

My First Attempt at Pound Cake (an absolute must with fresh strawberries!)

One of my favorite produces to get fresh from the fields, are strawberries. Fortunately in West Virginia by May/June, strawberries are abundant at all local farmer's markets: Butler's, Orr's, Ridgefield's, are some of my local faves.
Last weekend I stopped by Butler's to pick up some strawberries and only strawberries. Needless to say, that turned into a full-blown produce spree, and I obviously couldn't leave without a bottle of their homemade strawberry daiquiri mix (I opted for making strawberry margaritas instead and they were a-mazing). I also found a strawberry that kind of looked like a poodle: what do you think?


Anywho, after I got home I decided that I really wanted strawberry shortcake, which in my family simply translates to pound cake, strawberries, and whipped cream. Now, I have to confess: this family favorite usually involves both Sara Lee and Cool Whip. Being the baker that I am, though, I decided to do everything from scratch. The whipped cream part was a breeze, but I needed to find the perfect pound cake recipe (and by perfect I mean one I actually had the ingredients for). When I moved into Spring Maples, my mother gave me most of her cookbooks, so I decided to scour through them to find the recipe. In a 1970's book compiled by the Campus Crusades for Christ, called Delectable Collectibles, I found my recipe:
I only made one small adjustment: I'd seen another recipe for a "crusty pound cake" that advised turning the oven up to 350°F for the last 30 minutes: I gave it a whirl and was quite please with the outcome!

Friday, September 12, 2008

Toll House Test Lab

Mrs. Gupte, my high school chemistry teacher, often compared chemistry to cooking. She insisted that if you could do one, the other should come naturally. Let's just say I was an A+ chemistry student in high school. :)

Introduction: A couple of months ago, the NY Times ran "The Quest for the Perfect Chocolate Chip Cookie"on the origin of Toll House cookies. In the article they mentioned several tips, but the real breakthrough in the article revolved around the dough. Apparently, what most recipes fail to mention, is how long to let the dough sit (in the refrigerator obviously). Word on the street is 36 hours is the optimal time to let all the flavors meld together. Some fancy bakers in NY did an experiment and baked the dough at varying intervals. I was quite intrigued and decided that it was imperative I do my own testing to see if this holds true.

Objective: To find out if waiting to bake the dough makes a difference in the taste.

Equipment*:
2 1/4 cups whole wheat white flour (I try to be somewhat healthy)
1 tsp. baking soda
1 tsp. salt
1 cup Crisco (sometimes I use the Crisco suggest 6 tblspns. of water, others I don't)
3/4 cup normal sugar
3/4 cup brown sugar
1 tsp. vanilla extract (use real, not immitation)
2 large eggs (make sure they're not floaters!**)
2 cups semi-sweet (or dark) chocolate chips
Kosher/Sea Salt (optional)

Procedure:
1. Preheat the oven to 375°F

2. Combine dry ingredients (flour, soda, salt) in a small bowl; fluff with a fork to mix.

3. Combine wet ingredients (Crisco, sugar, brown sugar, and vanilla extract) in a medium to large bowl and mix until smooth. I always do this by hand, but if you're lazy/wimpy you can use a mixer.

4. Add the eggs and mix 'til combined.

5. Start adding the dry ingredients to the wet, but do this a little at a time and mix well in between. It's not worth getting impatient and dumping it all in at once, because you'll only end up with a huge mess and tired arms.

6. Mix in the chocolate chips.

7. Using a spoon, scoop up some dough and drop it on a cookie sheet.

8. Sprinkle some of the kosher/sea salt on top of the mounds.

9. Here's the part in question: you can bake them immediately, wait 24 hours, or go the full 36. If you don't use the dough immediately, be sure to cover it and place it in the refrigerator.

10. Whenver you decide to bake them, do it for around 9-13 minutes; this vary's oven-to-oven, so keep an eye on them!

11. Enjoy with a nice glass of milk, or if you're me, a nice glass of Maker's Mark.


Observations:
Instant Gratification

24 Hours

36 Hours


Data/Analysis:
Instant Gratification
Since I normally bake my cookies right away, this batch wasn't going to be anything new. I decided to change things up and try sprinkling the salt on top, per the NY Times suggestion. The salted cookies were super tasty, but they didn't really flatten. At first I was afraid, I'd done something wrong, but my unsalted batch turned out just fine!

24 Hours
Nothing terribly exciting at this stage. There was a slight richer flavour, but I don't know that it's worth waiting for.

36 Hours
At 36 hours, there was a distinct difference in both the raw dough and in the final product. As shown in the pictures, the dough was much darker and drier than in when first mixed. The taste was what really wow'd me! I don't know that I can pinpoint the flavors quite as distinctly as the NY Times folks did, but there was definitely more depth; most importantly, though, they were delicious!

Conclusion:
If you have the self-control to hold out for the full 36 hours, it's worth it. However, if you can't wait that long I would just go ahead and bake them immediately. There didn't seem to be enough of a difference at the 24 hour mark to really bother waiting. Basically, I would recommend that you either go all the way or not at all.

*This is a variation of the tradtion Nestle's Toll House recipe

**Here's an easy test to see if your eggs are still good to use. I always do this instead of going by the expiration date. I find that eggs are generally good for quite some time past that date (I believe my current carton says August 28, and they're still good). Just place your egg in a container of water. If it sinks it's good; if it floats, it's rotten!